

1. Sign up
1
Create your account
Head to app.hops.ai and sign up. If someone on your team already has a workspace, they can send you an invite link instead.
2
Land in your workspace
Once you’re in, you’ll see your workspace with My Space (your private space) and Hops ready to go.
Use Hops anywhere
Hops runs wherever you work. Sign in with the same account on every platform and your Spaces, threads, skills, and connections stay in sync.Browser
Open app.hops.ai in any modern browser. No install needed.
Desktop
Native desktop apps for macOS, Windows, and Linux. Download them from hops.ai/download.
- Android: Google and company single sign-on run inside the app.
- Phones: hold a link to open or copy it. Editing a message opens a full-screen page.
- Desktop: the Linux app starts on recent Ubuntu, a blank window after your Mac wakes recovers on its own, and right-clicking a link offers a new tab or the browser.
2. Talk to Hops
Every workspace comes with Hops — one AI agent, available in every Space. Open Home from the left sidebar to start a chat with Hops (titled Chats with Hops). Click New thread to begin a conversation, pick a starter prompt, or type your own. The same page has Skills, Connections, and your past Threads.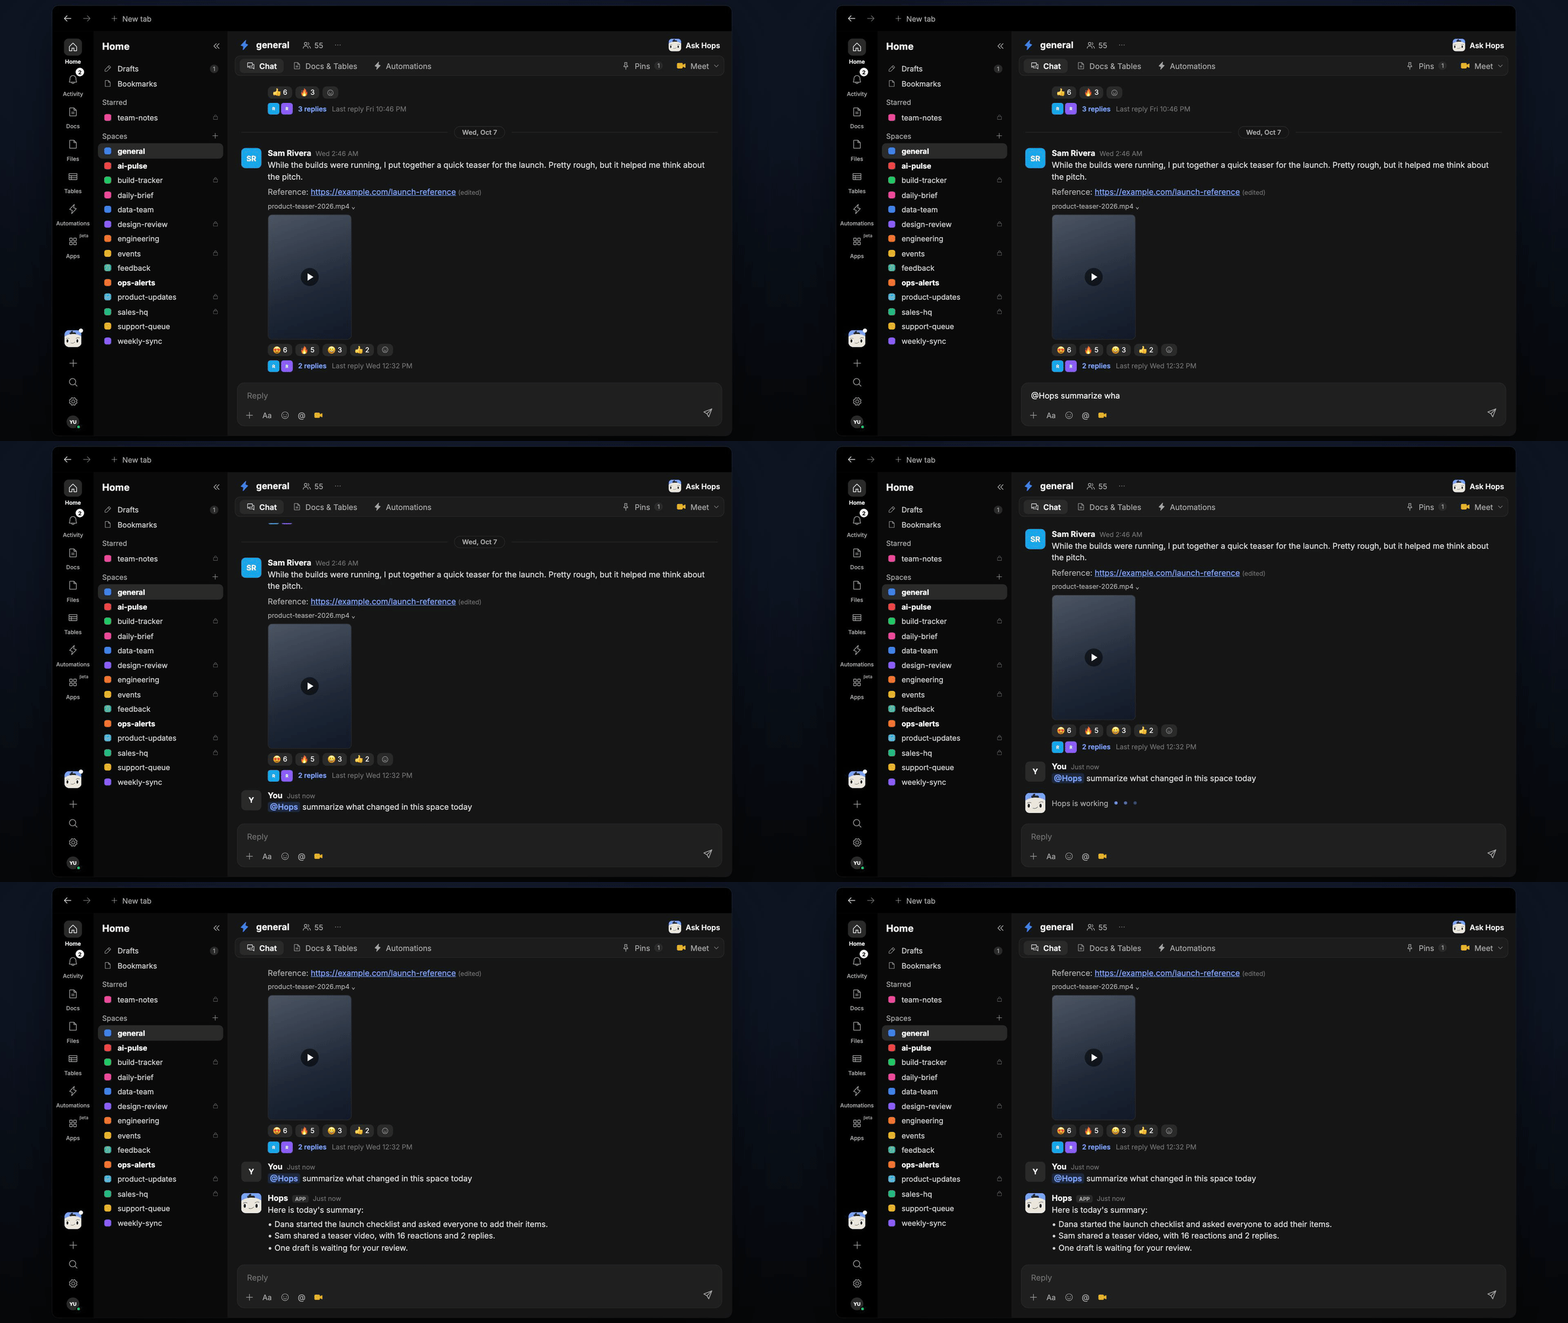
@hops in Ask Hops or Chat with Hops since you’re already talking directly to Hops. In a Space or group chat, tag @hops to bring Hops into the conversation.
This is the fastest way to see Hops in action. Think of it as a smart teammate who’s ready to help — and the same Hops shows up in every Space.
3. Create your first Space
A Space is where work happens. Think of it as a room for a project, a team, or a client. Everything inside a Space (conversations, docs, artifacts) becomes context Hops can use.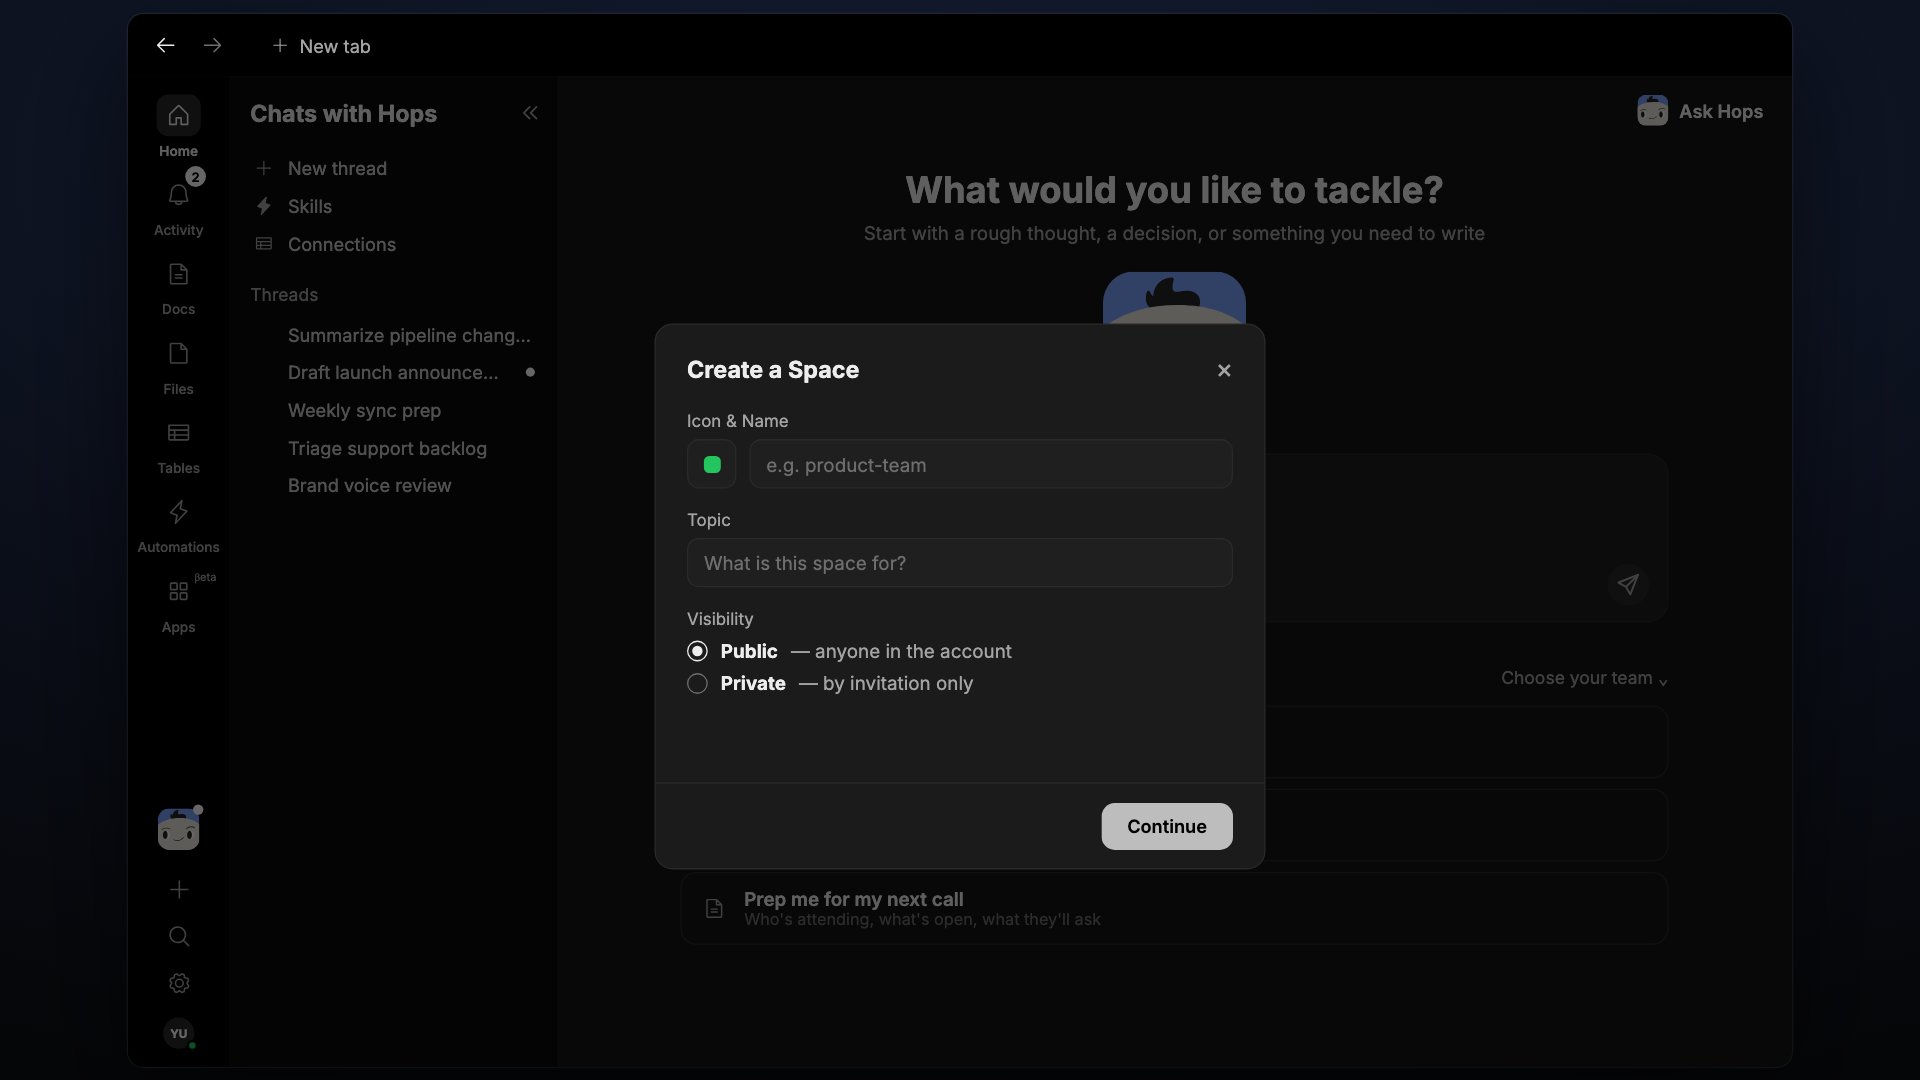
1
Click the + button
At the bottom of the left sidebar, click the + button and select Space.
2
Name your Space
In Icon & Name, pick an icon and enter a clear name like
Marketing, Q3 Launch, or Acme Account. Optionally add a Topic.3
Choose visibility and continue
Select Public (anyone in the account) or Private (by invitation only), then click Continue.
4. Upload a skill
Skills extend Hops for specific roles — a Sales SDR, a Legal reviewer, a Pipeline watcher — without introducing a separate agent. Upload a skill and Hops uses it whenever the request matches. Skills are shareable across your workspace so everyone’s Hops runs the same playbook.1
Open Settings → Skills
Open Home and choose Skills in the sidebar, or click Settings at the bottom of the left sidebar and go to Skills.
2
Click + New Skill
Choose Generate with AI, Create manually, Upload files (single-file skill), or Upload folder (multi-file skill).
3
Use it
Ask Hops as usual (tag
@hops if you’re in a Space or group chat). When a skill runs, the response is attributed like Hops · Pipeline watch so you know which skill shaped it.5. Use Hops in your Space
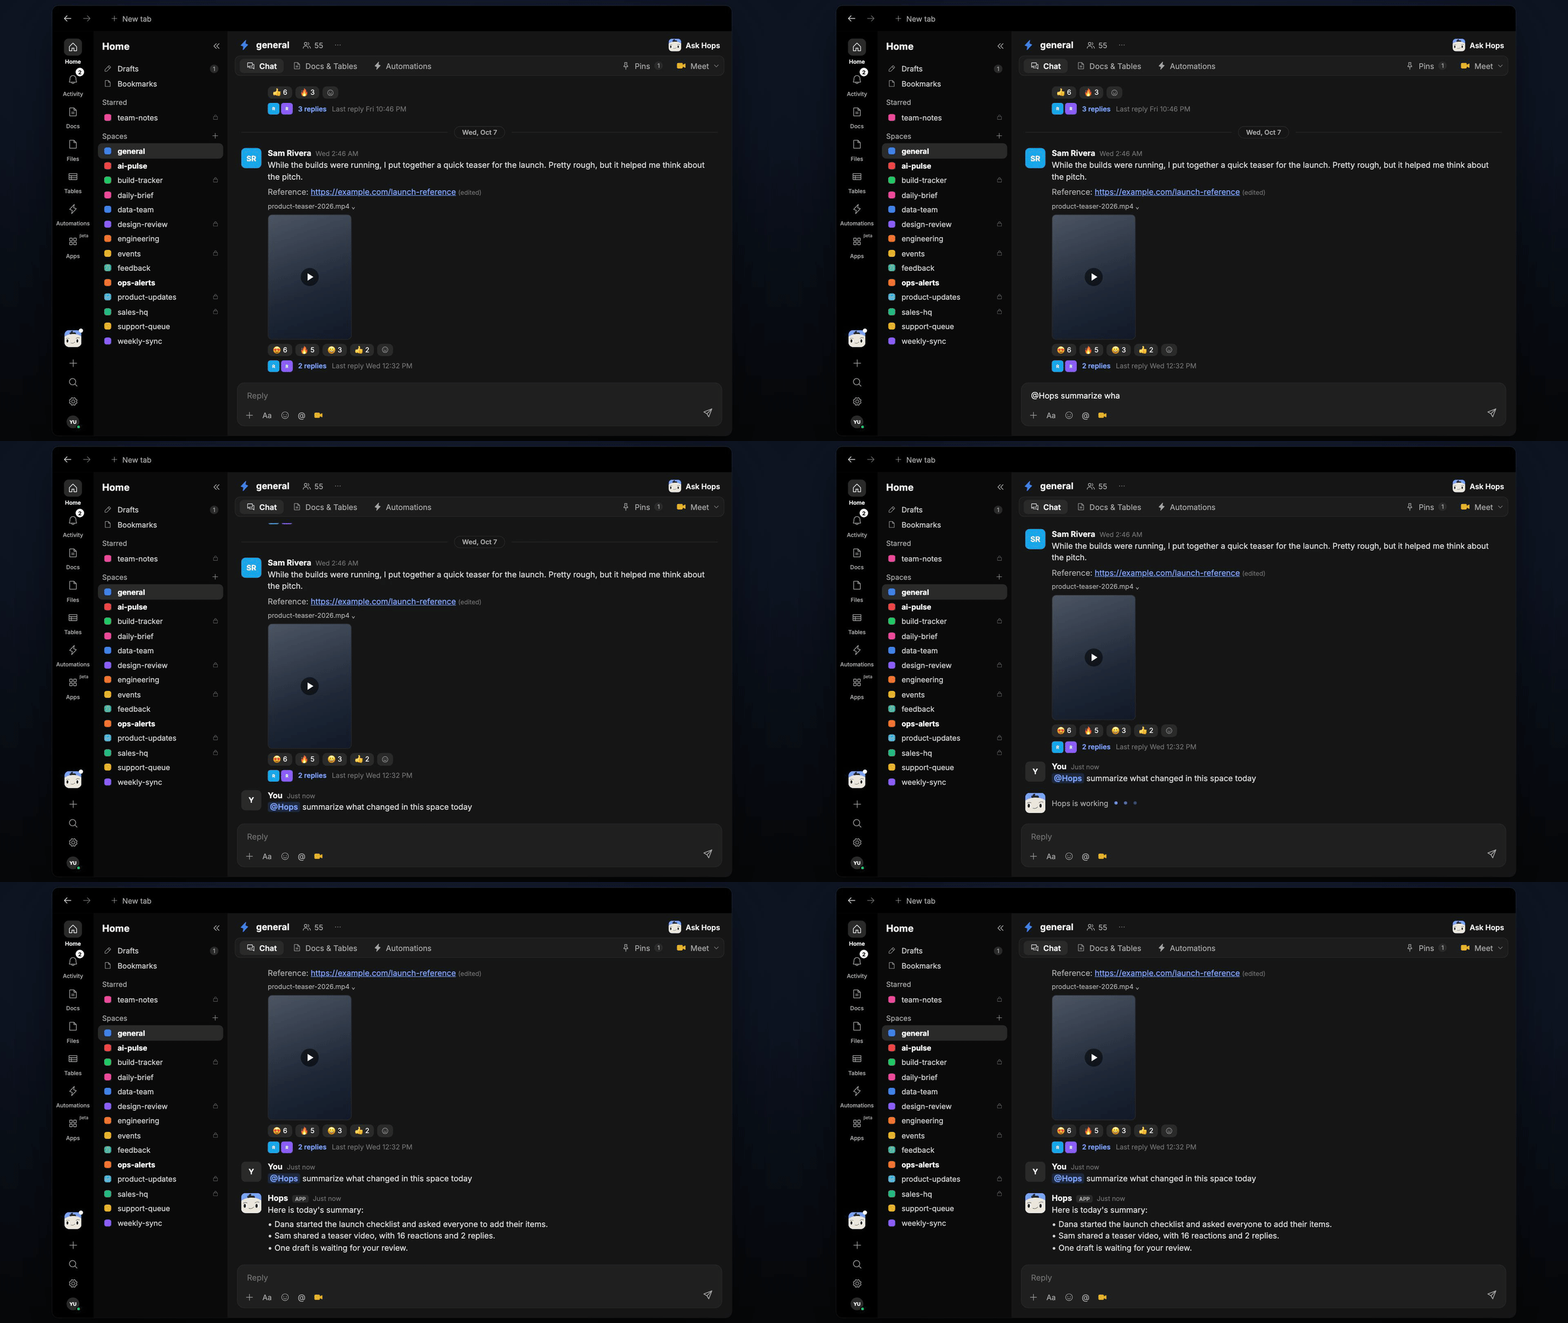
Once you’re in a Space, tag Hops with@Hops in the chat. Every Space has Hops available by default — no per-Space setup needed. If your workspace has skills installed, Hops uses them automatically when the request matches.
6. Invite your team
Bring your teammates into the workspace so they can join Spaces and work with Hops too.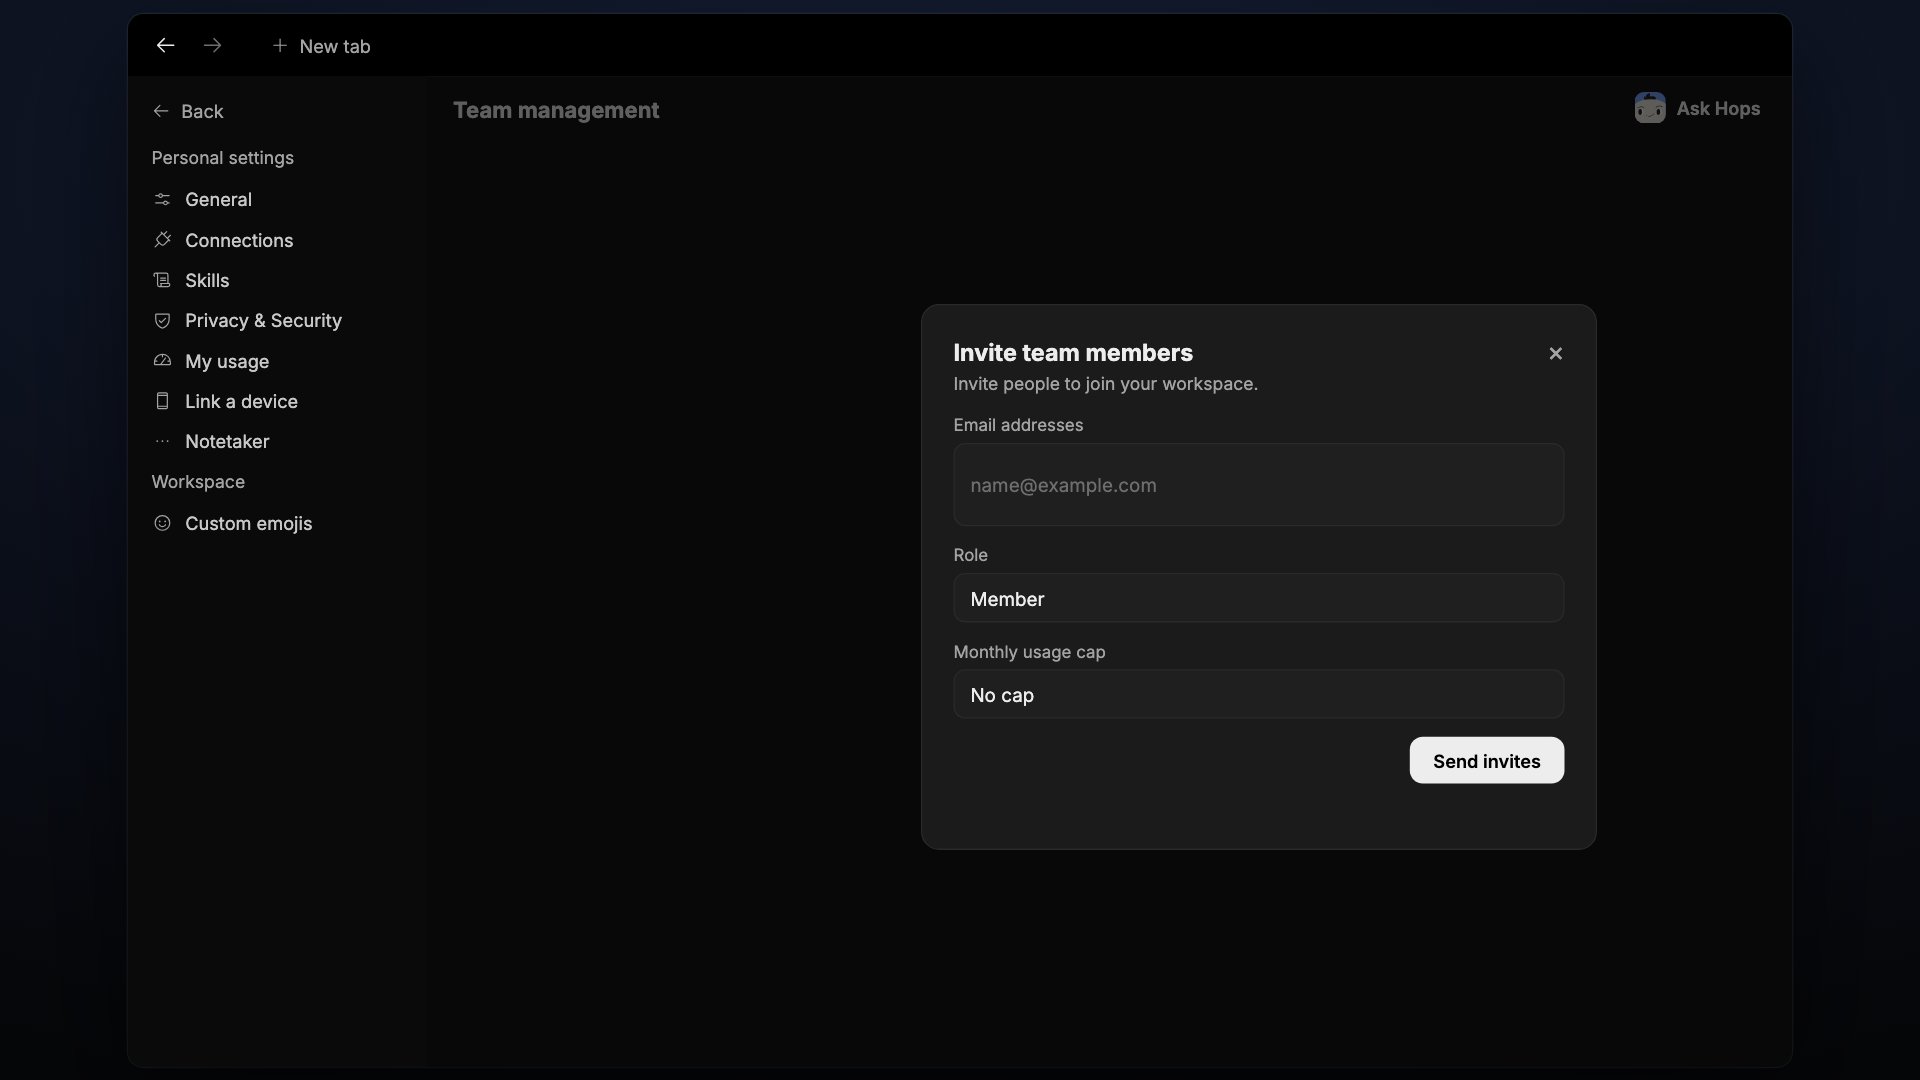
1
Open Team Management
Click the Settings icon in the bottom of the left sidebar, then go to Team Management.
2
Add seats and invite
Add seats for your team members and invite them to join your workspace.
7. Connect your tools
Hops works best when it can pull from the tools your team already uses. Hops connects to 2,000+ apps. Connections are managed from Settings → Connections and are shareable across your workspace — anything you connect there is available to Hops for everyone in the workspace.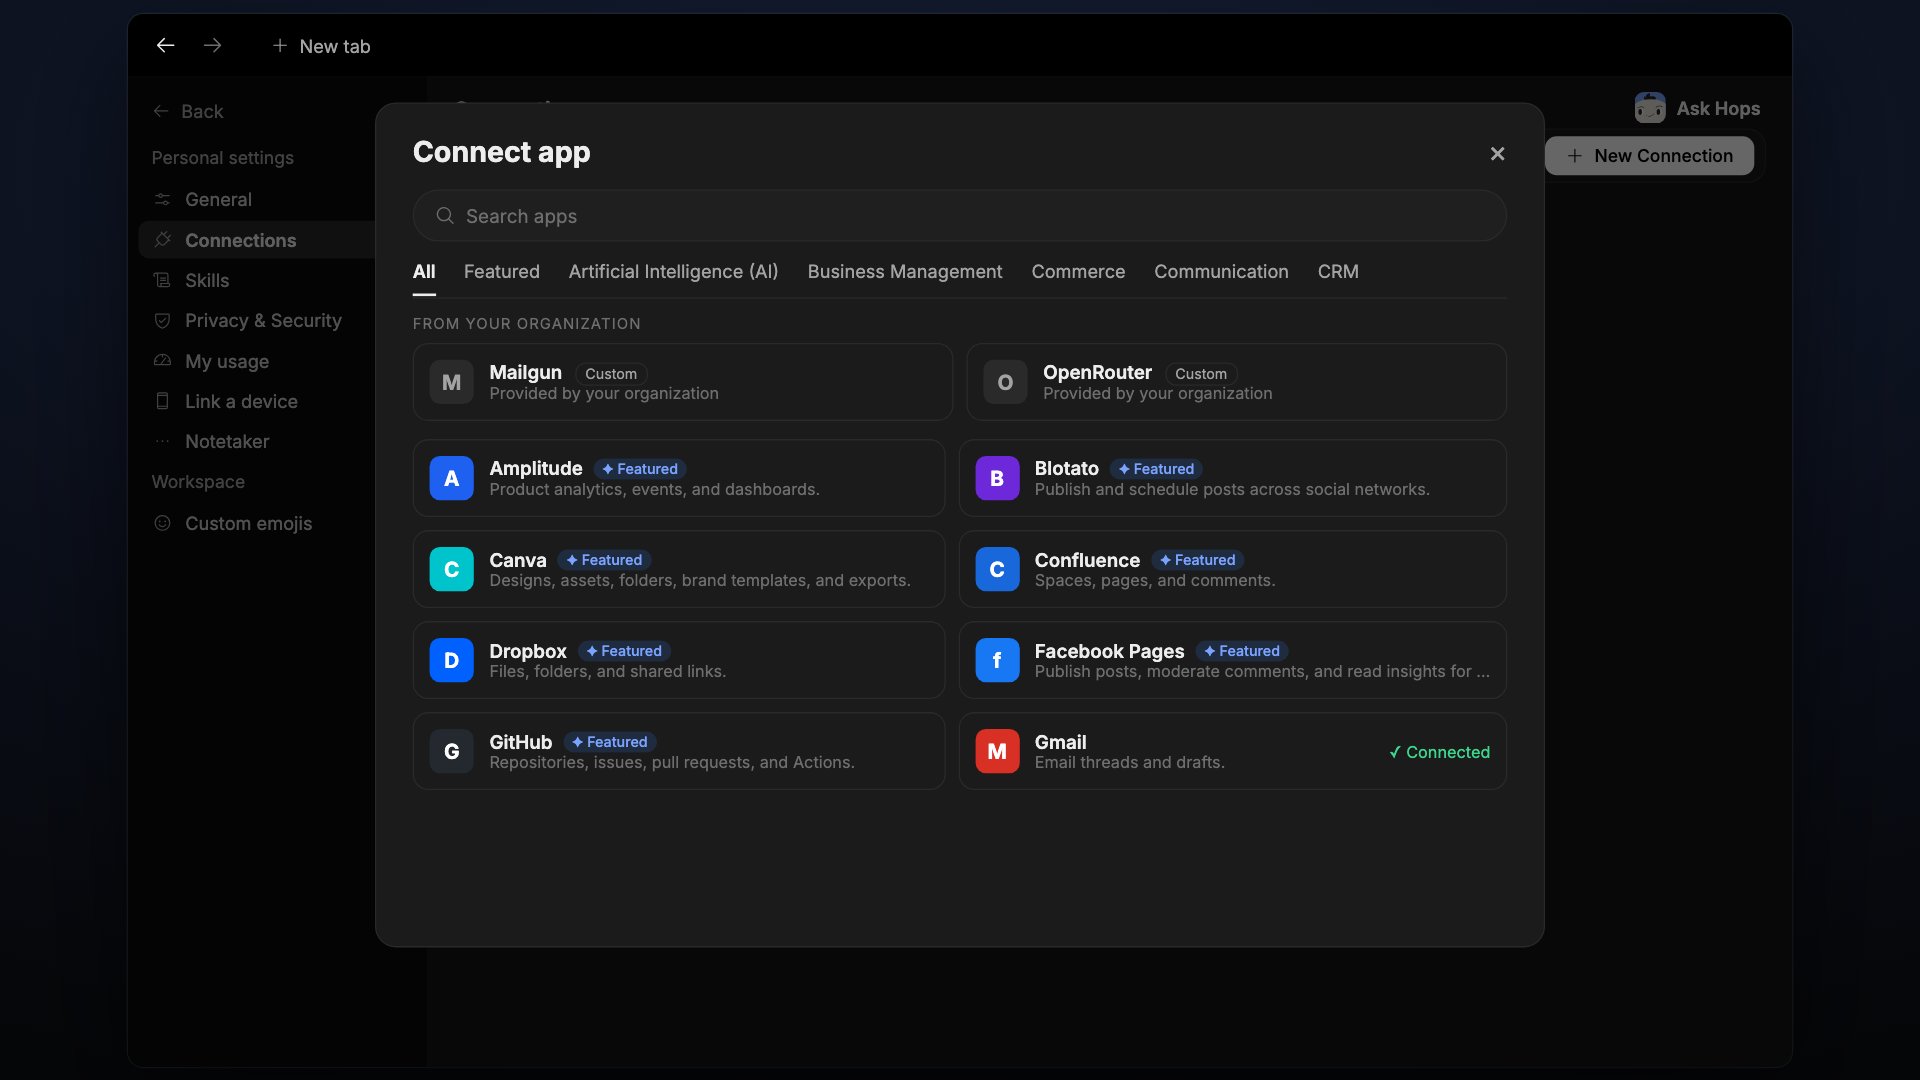
1
Open Connections
Go to Settings → Connections at app.hops.ai/settings/connections and click New Connection.
2
Pick a tool
Browse or search the list. Some popular ones:
- Gmail for email threads and drafts
- Google Drive & Docs for files, folders, and documents
- HubSpot for contacts, deals, and pipeline
- Jira for issues, sprints, and boards
- Linear for issues, projects, and cycles
- Notion for pages, databases, and wikis
- Slack for channels and conversations
3
Authorize and go
Click Connect next to any app, sign in, and grant Hops the permissions it needs. Hops (and any skill that uses the app) can start using it right away.
What to try next
Write your first doc
Capture briefs, notes, and specs Hops can read and edit.
Upload a file
Share PDFs, images, and exports across Spaces from one place.
Build a table
Track structured data — trackers, pipelines, research — with Hops.
Search everything
Use ⌘K to find any space, doc, file, or message instantly.
Set up the Space Context document
Write a brief, add a brand guide, or note key decisions so Hops always has them.
Set up an automation
Have Hops do recurring work automatically, like weekly summaries or daily reports.
Build a skill
Package your team’s playbook into a reusable skill.
Explore what teams do
See how marketing, sales, finance, and other teams use Hops day to day.
Need help? Reach out at support@hops.ai. We’re happy to walk you through anything.